Dark - 2ª Temporada
 8.5
8.5Seis meses após o desaparecimento de Mikkel, Jonas e Ulrich, as coisas em Winden estão cada vez mais misteriosas — e põem em jogo o futuro do mundo .
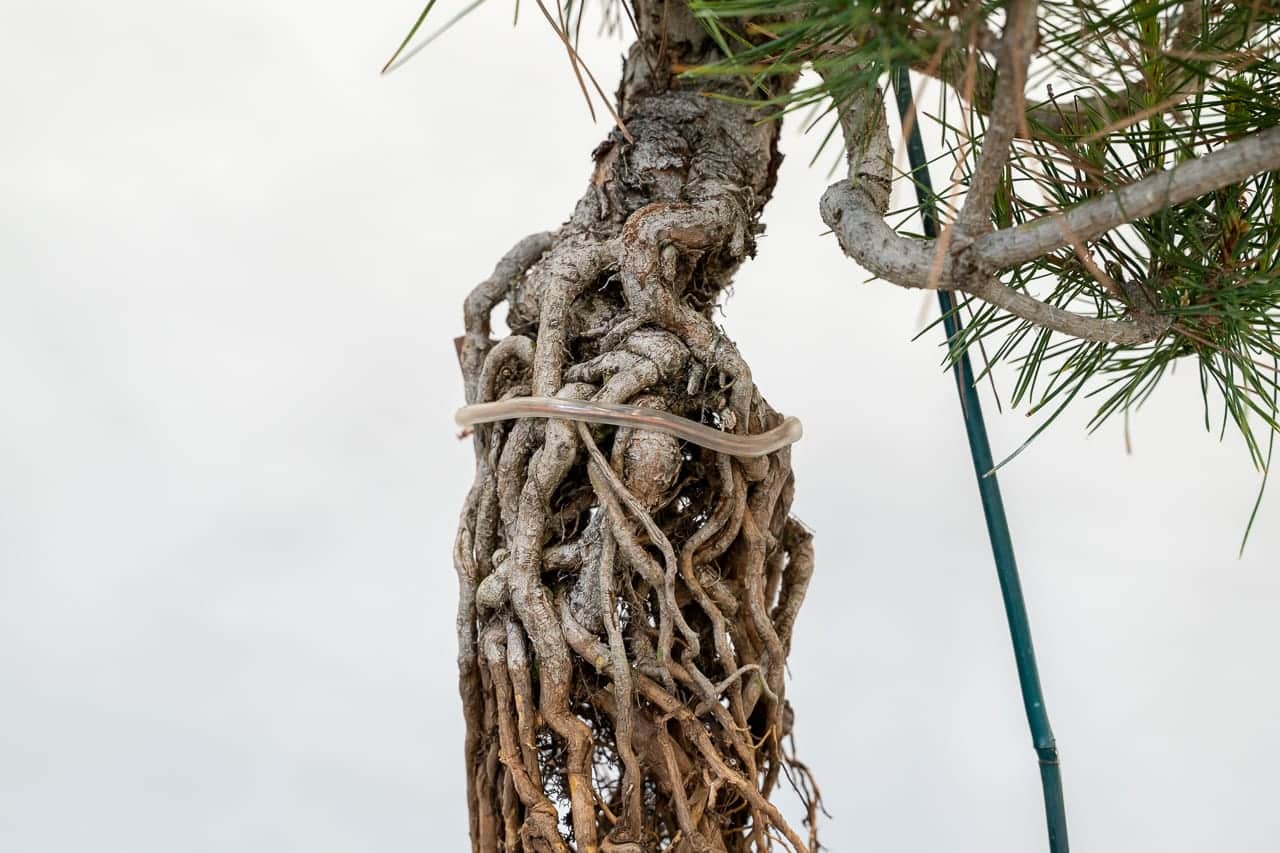
8.5One of the more fun parts of developing exposed root pines is adding movement to the roots. If you use a columnar container for the roots, the roots will grow in the shape of the column.
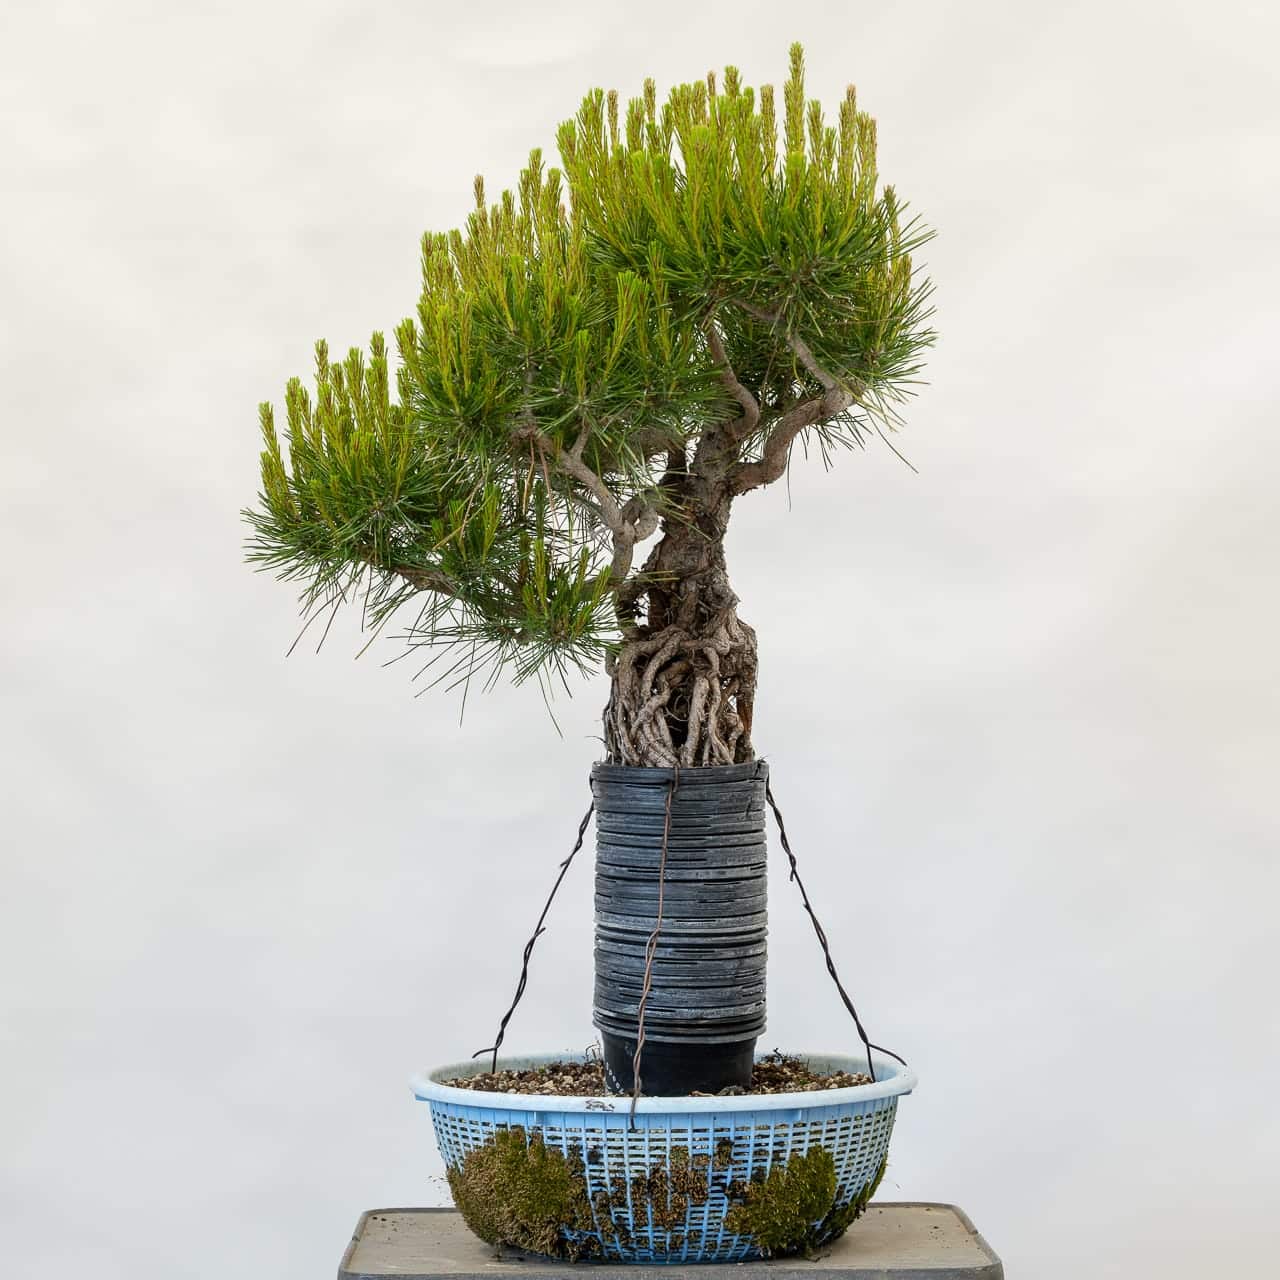
Exposed root red pine
It’s easy to add character to the shape of the roots as long as they haven’t thickened too much. The first step is removing the container.

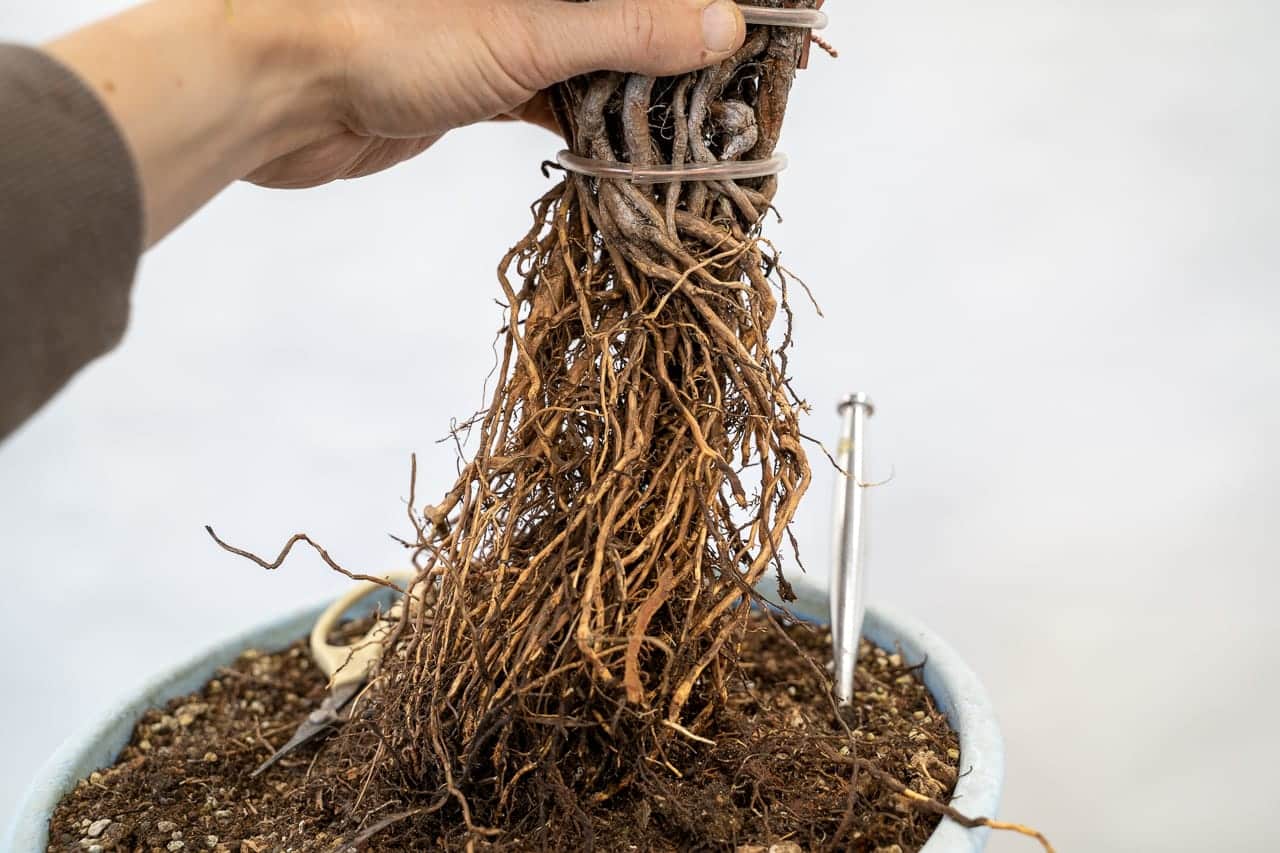
Removing the container holding the roots
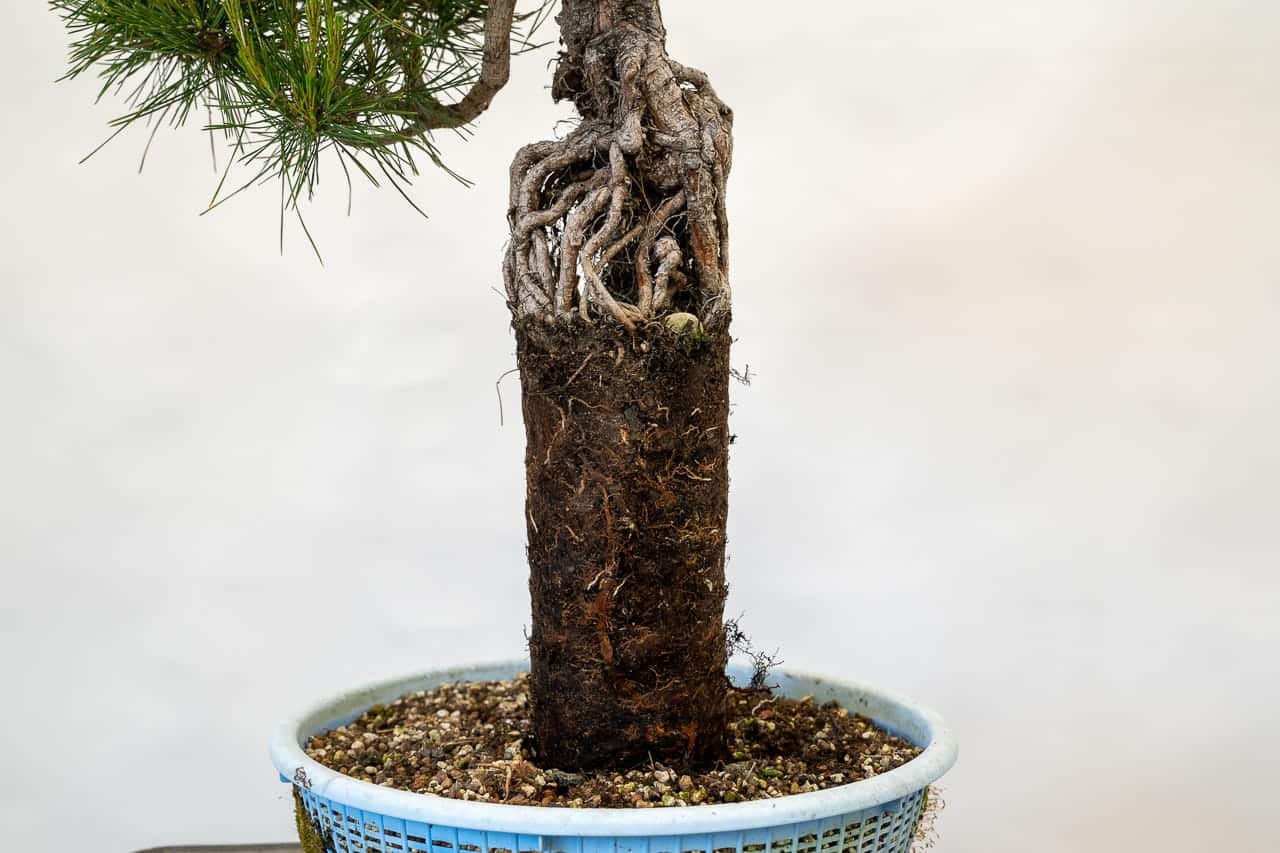
Column of roots
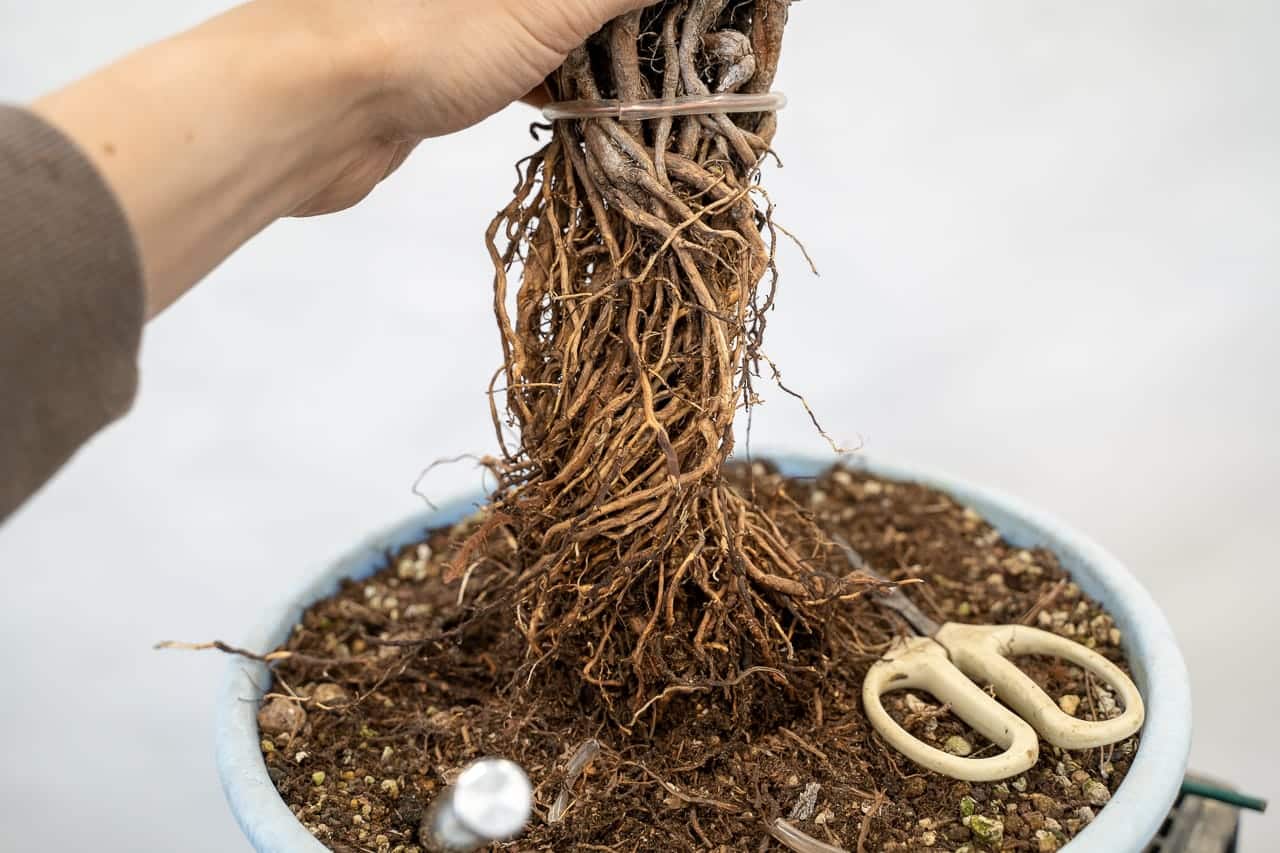
Before bending the roots, I like getting a better idea of what they actually look like. I use a pick to pluck out the particles of pumice around which the roots have been growing.
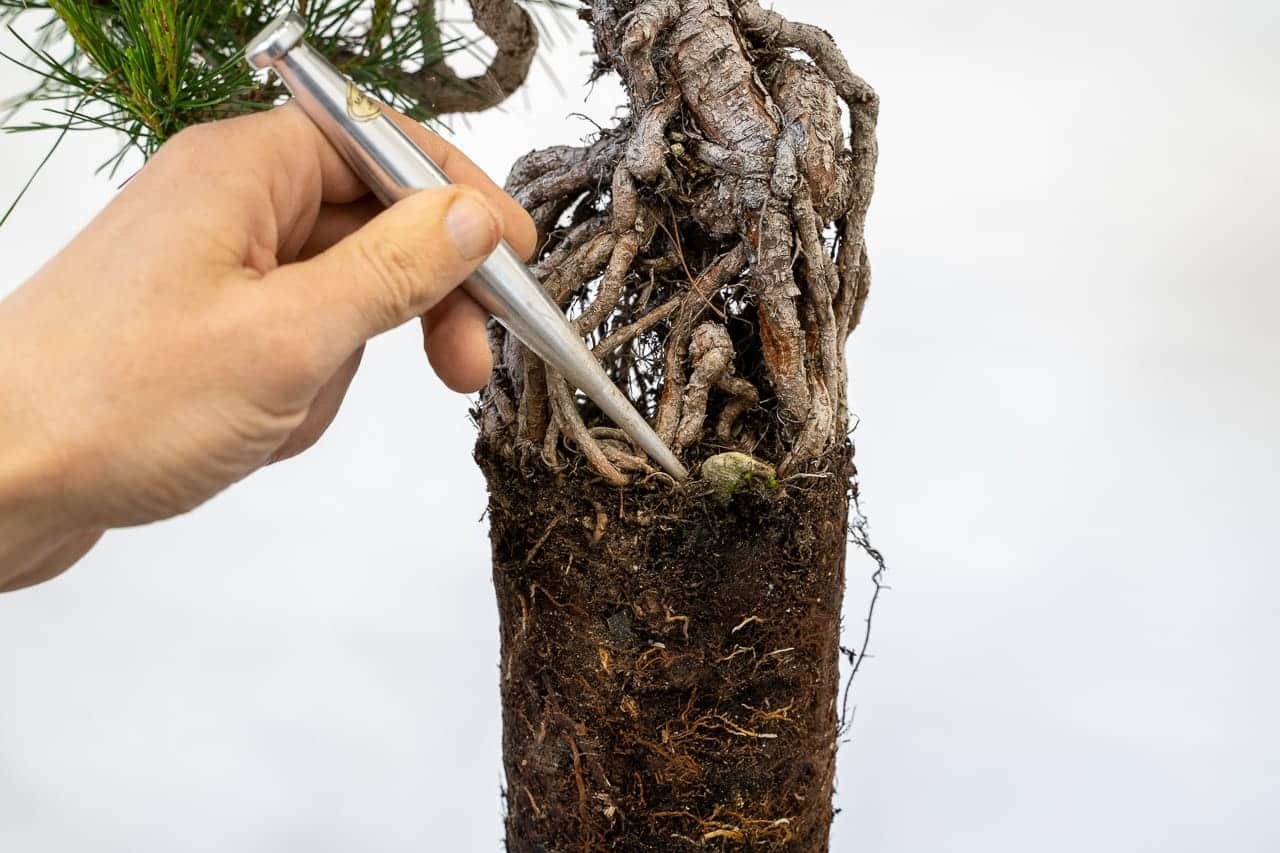
Removing pumice with a pick
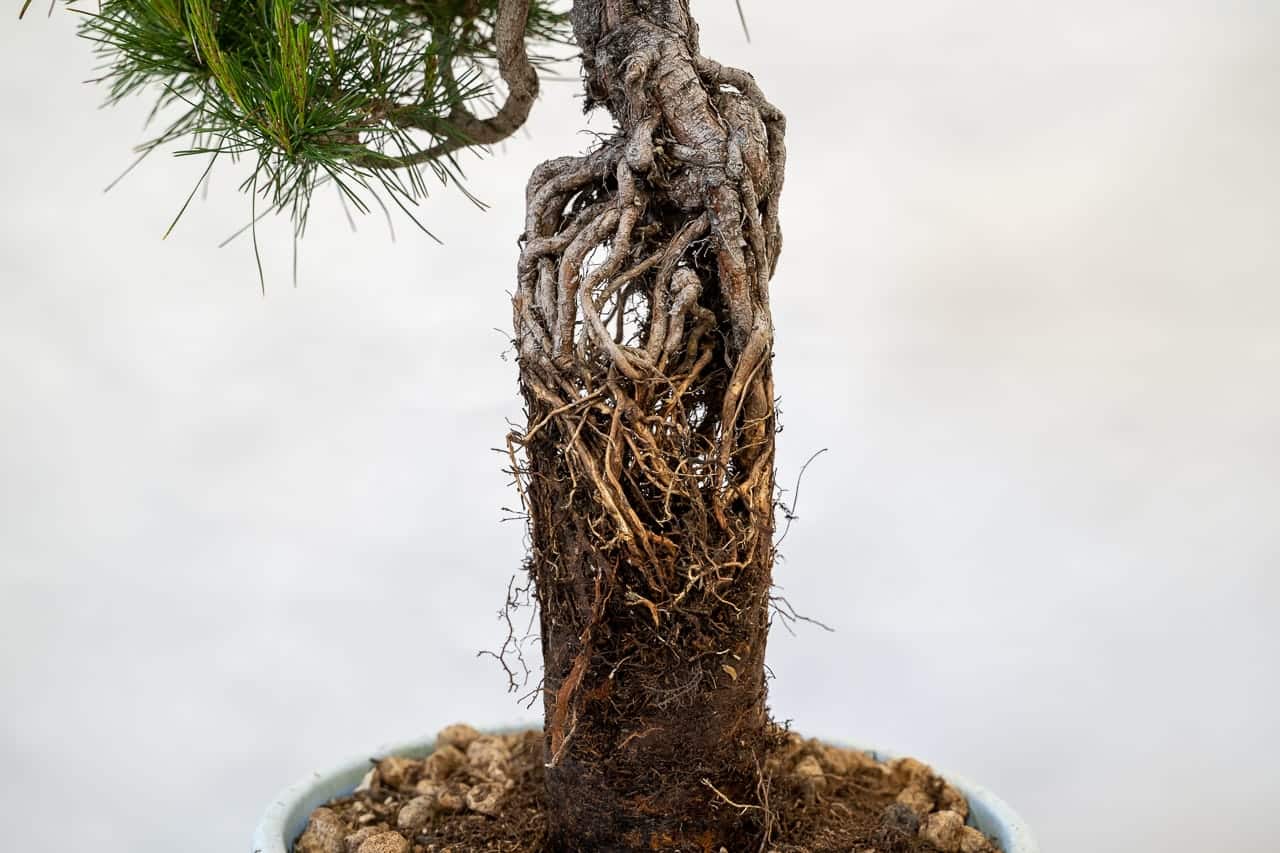
After removing some of the pumice

After cleaning out the pumice between the roots
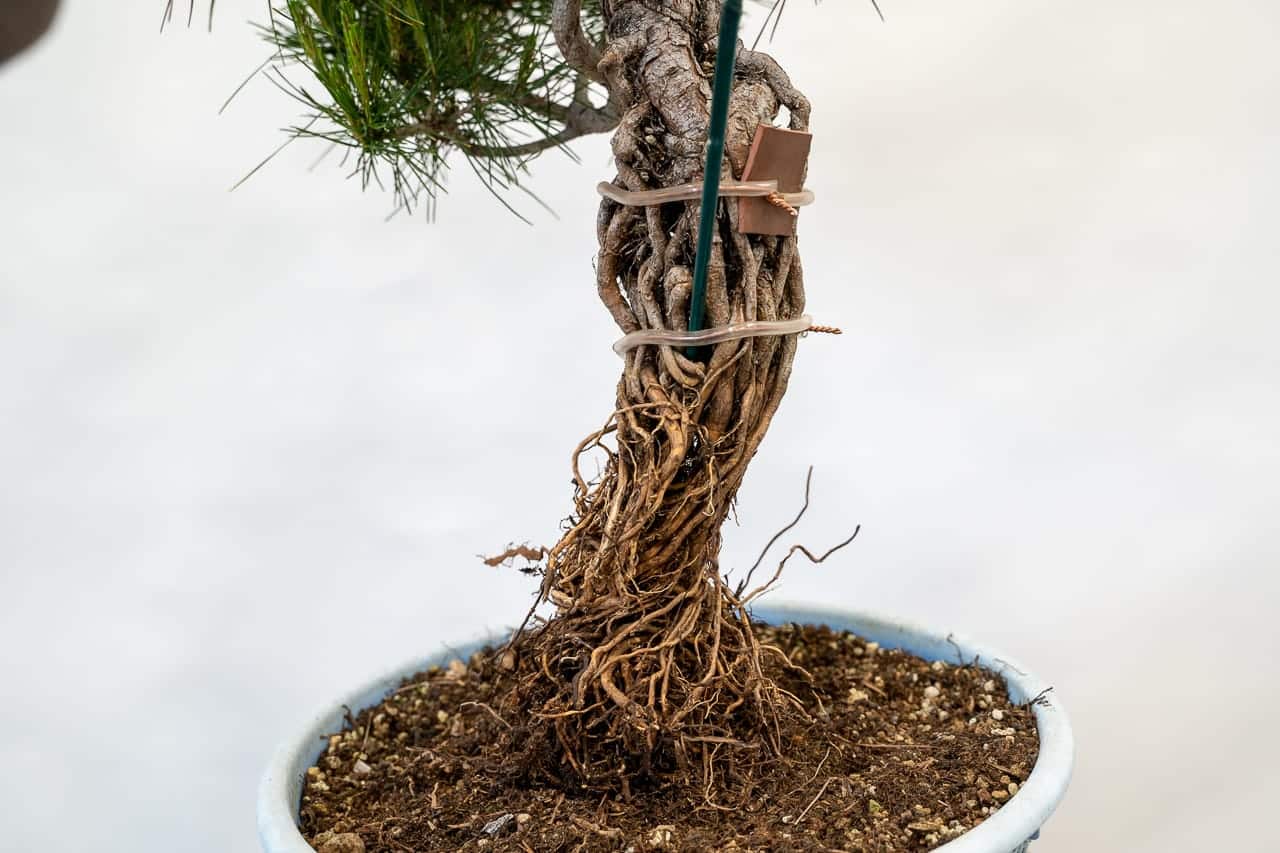
Although the number and distribution of roots is nice, the paths they follow can be improved. By bending some roots that form a ninety degree angle, I can create some taper near the top of the root mass.

Awkward bend on the right side of the root mass
After reducing the awkward angle with wire
Another way to add interest is to twist the root mass.
The roots are relatively straight
After twisting the roots counter-clockwise
At this stage of development, there are no right or wrong ways to go about improving the roots. The main goal is to add as much interest as possible.
After making a few more adjustments
The resulting shape isn’t necessarily the final shape the roots will take as there will be opportunities to further bend the roots in the future. For now I want the roots to continue to thicken for another one to two years and then see what happens.
To protect some of the smaller roots that I exposed, I built a cylinder with drainage screen that will hold 5/16″ pumice. The particle size is too large to encourage new fine roots to develop but will be small enough to provide additional moisture and insulation for the more tender roots.
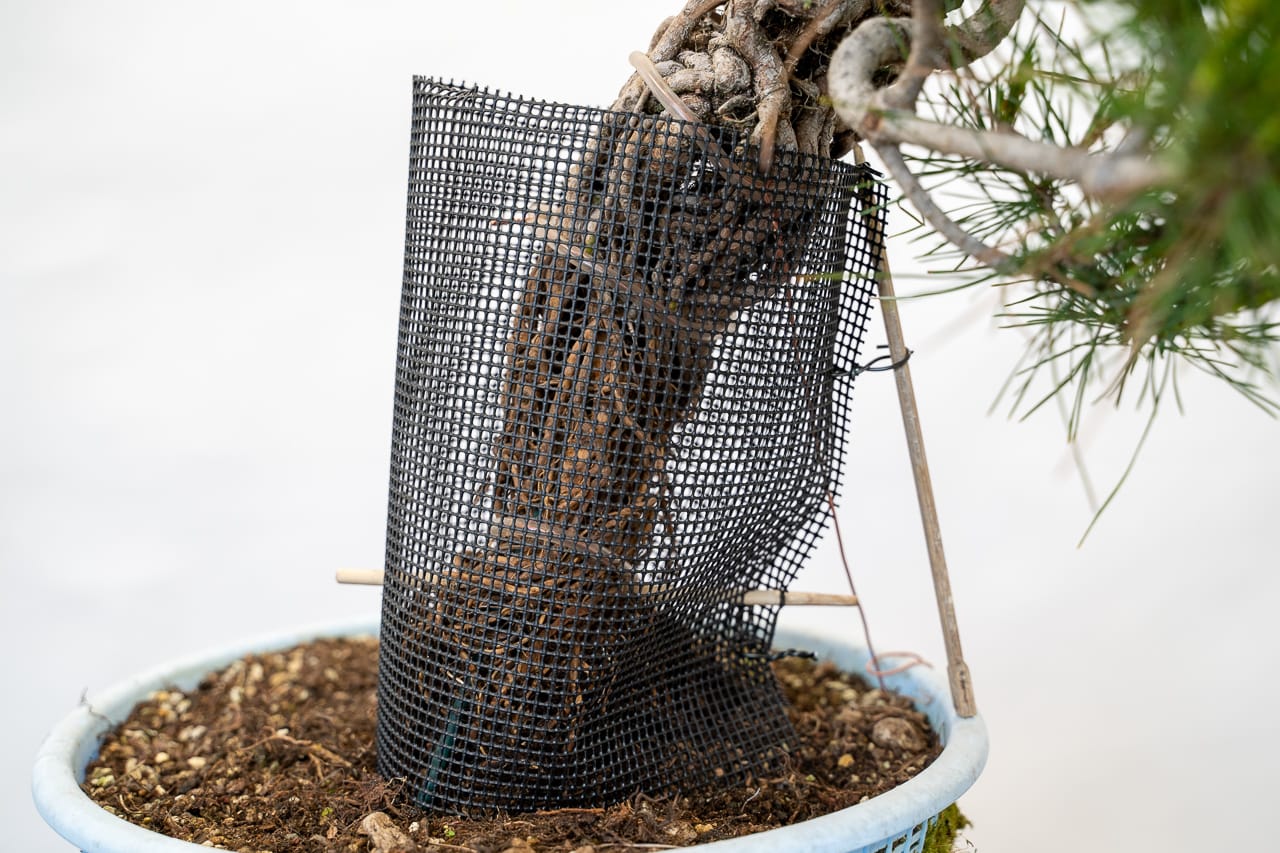
Drainage screen
After adding pumice around the roots
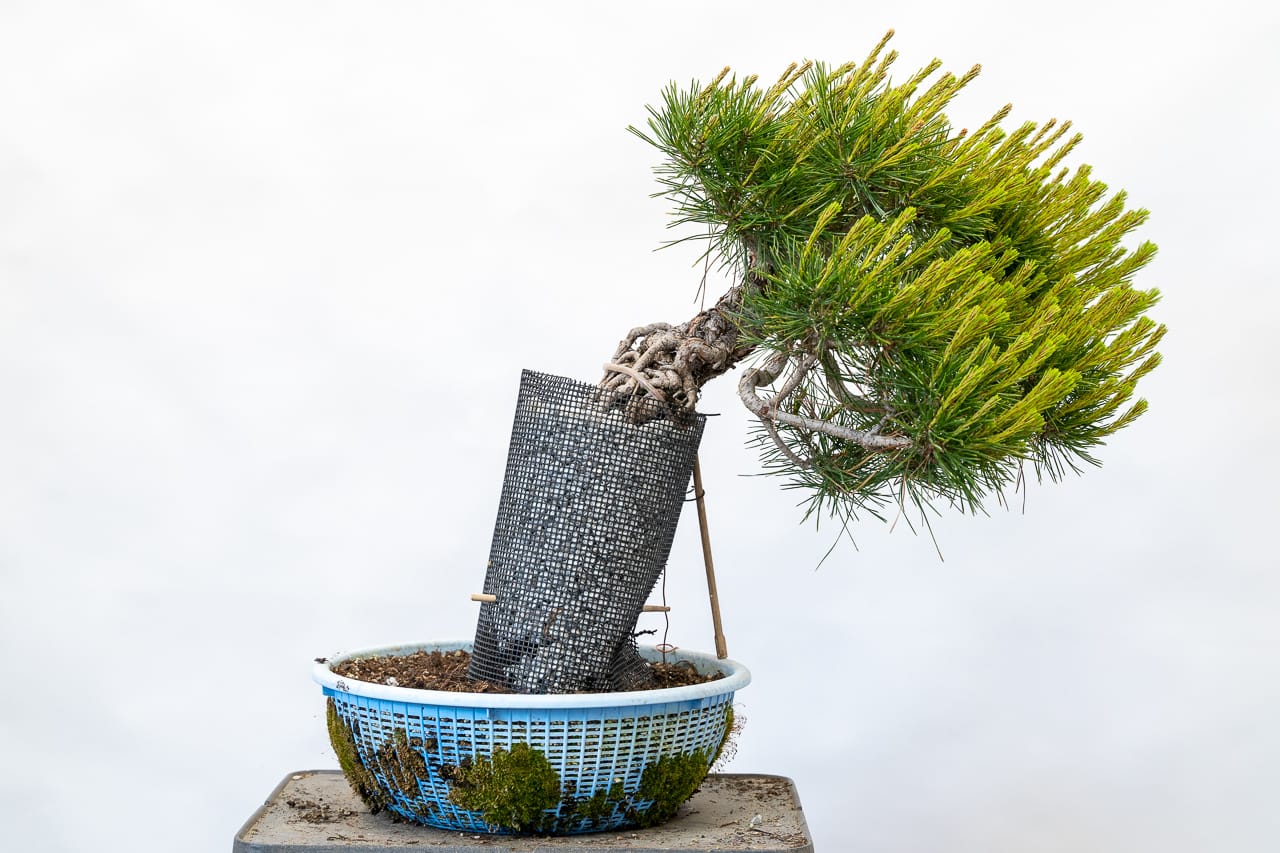
It’s obvious from the change in the angle that there is still a lot of work that needs to be done to the branches. It’s hard to know exactly how to set the branches until the final angle of the roots is set so I’ve been focusing on creating branch density as this will provide options for styling down the road.
I took similar approaches with a number of young exposed root pines this year. Here are some examples (thanks to Max for doing most of the work on these!)
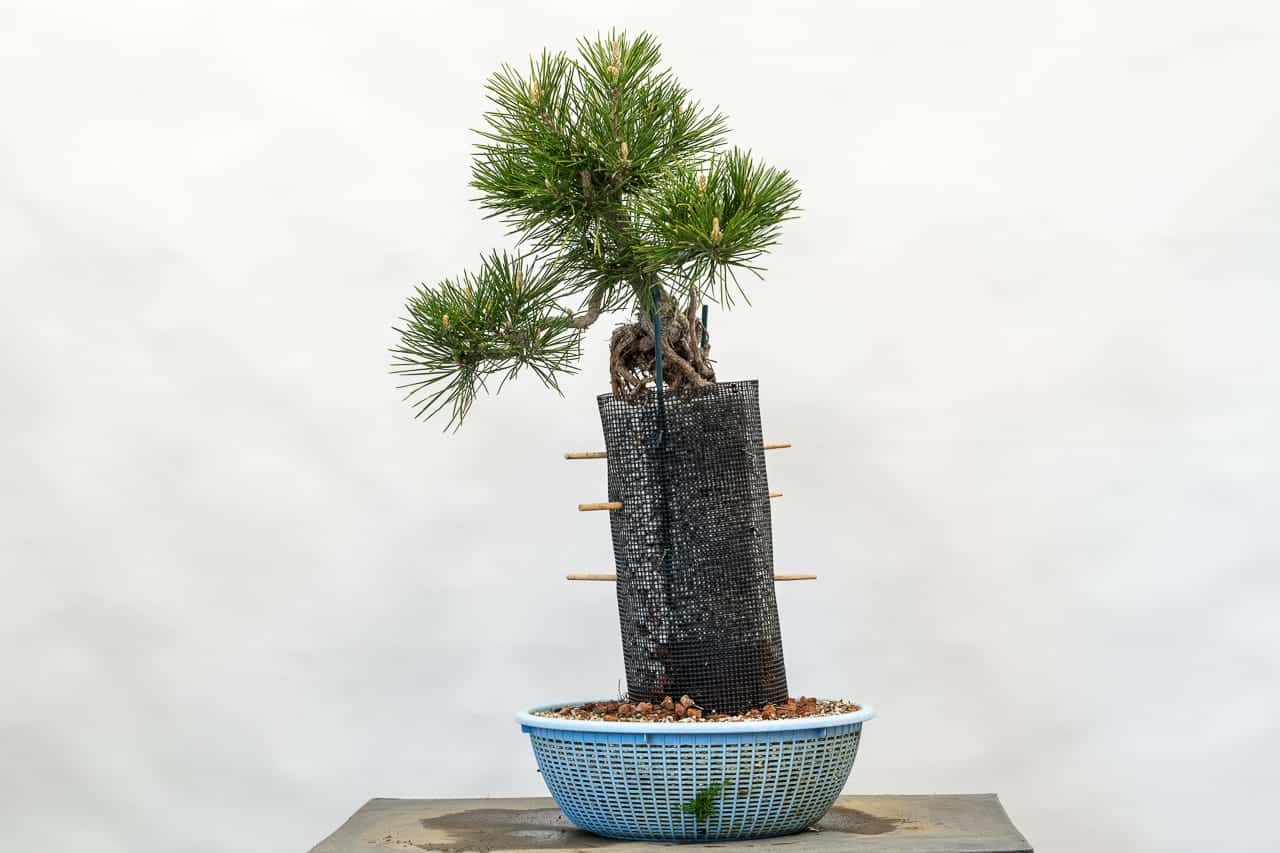
An exposed root black pine after twisting the roots
An exposed root black pine after rearranging the roots

An exposed root black pine after bending the roots
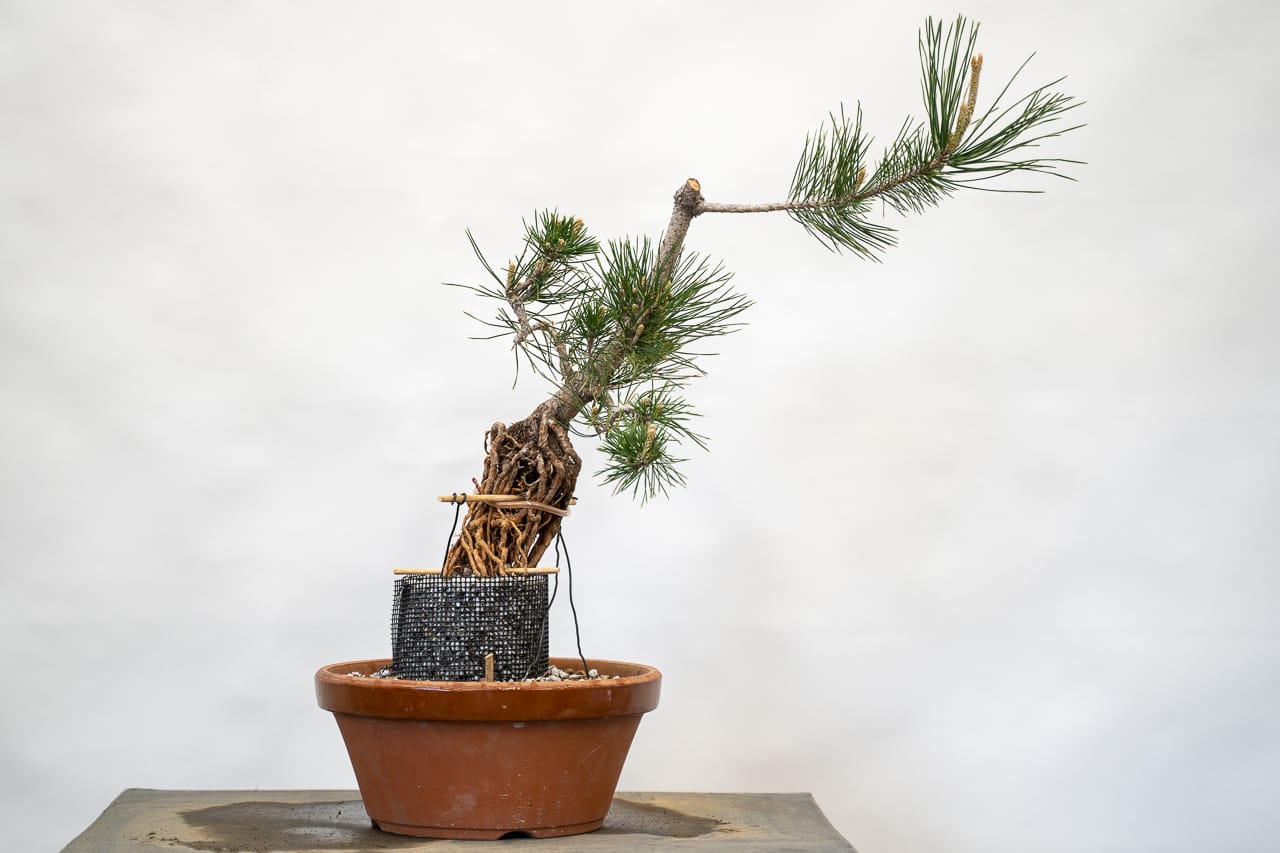
I plan to prune these trees in the next few months, but will let them grow freely for the time being to encourage the roots to thicken as much as possible.
The Houston Bonsai Society and the American Bonsai Society will host Bonsai on the Bayou in Houston, Texas this Thursday through Sunday. The event will feature an exhibit, workshops, vendors area, raffles, live and silent auctions, and demonstrations from headliners Boon Manakitivipart, Ryan Neil, and Enrique Castaño de la Serna.
I’ll be vending at the event and leading a workshop on shohin red pine bonsai. Learn more or register online here.
In the meantime, check out Pete Parker’s introduction to bonsai on Houston’s KPRC 2.
Hope to see you there!
ULTRA-ROOTS
We are exploring the third generation of "ROOTS" development as a major Dwarf Schefflera training strategy. Initially we created a taller, simple, more elegant version of Sumo; except that straight roots were longer and more prominent. Customers who visit Fuku-Bonsai and who can compare the various designs side-by-side have made this "BASIC ROOTS" into our most popular.
Second generation trials, explored pretrained "EXTENDED ROOTS" to use for taller root-over-rock plantings. These are the favorite dramatic rock plantings and if the roots are already extended, the success rate is dramatically enhanced. The roots form beautiful complex design that compliments the texture of the rocks. Part of this second generation featured "EXPOSED ROOTS."
We call this third generation trials: "ULTRA-ROOTS" because you need to start with long extended roots and take the uncommon pioneering trees to the next design level!

SO HOW DO YOU ADD DRAMA TO AN INTERESTING "EXTENDED ROOTS"? How about doubling the height by mounting it on a skinny stick about the thickness of the trunk. First stabilize the base by drilling holes and attaching wires and creating a wire network. Cement rocks into the base and leave the wires standing up long enough to anchor the stick to the rock to keep it upright and to prevent what will be a top-heavy plant from toppling.

The tree already had a nice extended roots and could have gone into a 17"x12"x2" oval pot and been a fairly nice slanting trunked tree with interesting swirling aerial roots. But instead the roots were extended further to be a tall and thin "ULTRA-ROOTS!" First all the roots were separated and uncoiled and the curve at the base of the trunk-roots base was matched to the curve of the skinny stick and the two tied together with the green plastic ribbon tie in four places. The roots were recoiled down the stick with effort to minimize where the overall root girth where there was a lot of roots, and to build up where there weren't enough. Then the roots were formed into a single bundle to continue the coiling to the pot.
At this point there is a top-heavy reverse taper and over the next two to four years, the roots will be extended and especially thickened in the lower section so it will appear to be a securely anchored tall slender elegant "root-tree" with a thin, flattish, wide, umbrella-like foliage crown. Can you see it?

Fuku-Bonsai's aggregate media can be reused. With a 3/8" screen, shift the old media and what is caught in the screen is use as a hill for the central drainage hill. Rescreen what went through the 3/8" screen and what is caught in the 1/4" screen is used to further build up the central drainage hill.
Note that the largest root area just above the middle is about 3" in diameter. So from that widest area, the aluminum foil apron will become 3.5", then 4", then 4.5", then 5". So we start the base of the foil column at 6" in diameter and complete installing the coarse materials in the pot and cover with some fines.

We've used up most of the coarse old material in the pot and began filling the aluminum foil collar with 50% coarse bottom, 50% body mix, and Nutrient Granules. The foil at the base is about 6" in diameter and in a few years when the roots reach the pot, they will spread out and thicken. The foil column steadily becomes smaller as each additional section is added. Use a long dibble and tap and shape the foil column as you fill it.
Use masking tape in a spiral to help create support and to hold the shape as you build the foil column. Then squeeze all tight and firm and use 1/4" strong monofilament tape to tightly compress the foil column. Shape the top like a rain catchment funnel and line the top with sphagnum moss to not allow the media at the top of the foil column to dry. So when watered, the water will very quickly penetrate all the media in the foil column.
Be sure to poke a lot of pencil size air holes to allow the media in the foil column to breathe. If there is too much water retention and inadequate air circulation, the roots in the column will rot.
This tree began heavily pruned with a relatively short trunk. Initially, the main bottom root and all roots on one side of the trunk were removed to form that sharp bend with coiling roots going around the strongest remaining root. The supporting stick is about the same size as the largest remaining root and the roots were attached to the stick in a manner that most will think that it is an "all root column" and once the roots completely hide the stick, the illusion will be more realistic and the arrangement will have an interesting wobbling effect.
In this type of all root-trunk designs, roots can go spiraling all in one direction or can be woven and crossing on the way down. I've done both types and prefer the simple lines of the spirals.


Jonathan says
Thanks for this blog post. It was very informative. I was wondering where do you buy these columnar containers?
Jonas Dupuich says
Hi Jonathan! The container in the photo here is scraps from small plastic pots: https://bonsaitonight.com/2013/03/26/repotting-1-year-old-black-pine-seedlings/
Anything will work, whether nursery containers, sections of drain pipe or sheet plastic rolled into a cylinder.
Ophelia says
Hiya would this work with Junipers?
Jonas Dupuich says
Hi Ophelia – this approach can work with any exposed root bonsai in training that has flexible roots. Junipers have flexible roots so I would expect this to work for them.